Intro
You found a bite or a dark smudge on your mattress. Don’t freak. Act.
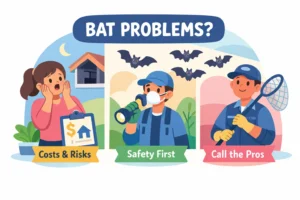
Bed bugs are stubborn. They are also treatable. The main job is picking a qualified pro and following their prep instructions. Bug Managers has handled dozens of GTA cases. This is the practical guide we wish every customer read before calling anyone.
First 48 hours: quick triage and what to do right now
What you look for matters more than panic. Look closely at mattress seams, box springs, headboards and the bed frame. Live bugs are visible if the infestation is active. Tiny rust-coloured spots are bed bug droppings. Shed skins and small clusters near seams are also common. Bites often appear in lines or clusters.
Photograph anything you find. Get photos from 6–12 inches away. Clear images speed diagnosis and quoting.
Do not spray household insecticides across rooms. Do not move suspicious items from room to room. You’ll spread the problem.
Short action list — what to do now:
- Isolate the bed: pull it away from walls and remove floor clutter.
- Bag linens and launder on the hottest safe setting; seal cleaned items in plastic.
- Call for an inspection. If you see bugs on the mattress or vulnerable people live there, request same‑day triage.
- Do not attempt broad DIY sprays or move infested furniture between rooms.
Why call a pro first? A proper inspection reveals scope. A rushed DIY treatment wastes time and money. Certified technicians know hiding spots you won’t check. If you’re in the GTA, ask for a licensed inspection — Bug Managers offers free inspections and same‑day triage for urgent cases.
Treatment options, explained plainly — what works, what doesn’t
Think in terms of Integrated Pest Management. Good technicians combine methods tailored to the situation. No single trick cures everything.
Heat treatment
Pros: Professionals raise room temperatures to lethal levels. Heat kills eggs and adults quickly and needs no toxic residues. It works fast.
Cons: It costs more. Some items can be damaged if not removed or protected. It must be done by trained teams with the right equipment and monitoring.
Typical outcome: Often one major session plus monitoring. When executed correctly, heat can achieve very high kill rates—but even heat needs careful setup to avoid cold pockets.
Chemical treatments
Pros: Targeted sprays and dusts are less costly up front. They provide residual protection in hiding places.
Cons: Bed bugs can show resistance. Chemicals often require multiple visits and strict safety steps when children or pets are present. Expect 2–4 visits and monitoring over several weeks in many cases.
Steam, freezing, fumigation and non-chemical tools
Steam and freezing are useful for isolated items and cracks. They kill on contact but have no lasting residue. Fumigation is rare, disruptive and costly—reserved for extreme or building-wide situations. Mattress encasements and interceptors should be used regardless of the main treatment. They are inexpensive, effective for monitoring, and prevent re-establishment.
Price tags and timelines — realistic expectations in Canada
Costs vary by city, size, severity and method. Here are practical ranges you’ll hear across Canada and in the GTA.
For small apartments (studio/1‑bed): expect roughly $250–$1,500 CAD. For an average 3‑bed home: $800–$3,000+. Heat treatments sit at the higher end; chemical-only plans are cheaper. Per‑room pricing is common. Severe infestations, neighbouring-unit spread and high‑rise logistics drive prices up.
Timelines differ by method. Heat is often one big day for treatment plus a follow-up inspection. Chemicals usually need an initial visit and then 1–3 follow-ups over 2–6 weeks. Plan on monitoring for up to 2–3 months in stubborn cases. Don’t compare sticker prices alone: compare scope. A low quote that skips inspection or follow-ups is a false economy. Get three written quotes and compare what’s included.
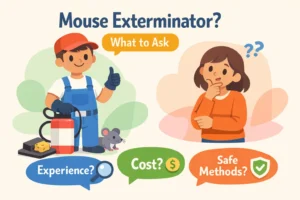
How to vet and shortlist local exterminators — questions and red flags
Good companies make it easy to vet them. They provide licences, insurance proof, method details and written guarantees. In Ontario, ask about the Structural Exterminator and Pesticide Operator licences from the provincial authority. Also insist on proof of general liability insurance.
Use this short script when you call:
“Do you inspect before quoting? What methods and products will you use—can you give product names and registration numbers (Health Canada/PMRA PCP)? How many visits are included? What is your warranty and what voids it? Can you provide references from similar units?”
Red flags to hang up on: promises of a guaranteed one‑visit cure, heavy reliance on foggers or consumer sprays, evasive answers about product names, no written report, or pushy up‑front payments with no contract.
Quick vetting checklist to use on calls or websites:
- Valid provincial licence and proof of liability insurance.
- Written quote and a clear contract outlining methods and costs.
- Product transparency (registered product numbers) and safety protocols for kids/pets.
- Follow‑up guarantee and stated re‑treatment policy.
- Local references and clear prep instructions.
When you call, note how they respond. A reputable company answers directly. For example, Bug Managers provides free inspections, licensed technicians, eco‑friendly options, and a documented re‑treatment policy—exactly the sort of firm you want on the shortlist.
Prep and aftercare — the step-by-step checklist that saves money
Prep matters. Do less, done better. Follow the tech’s instructions exactly. Skipping prep can void warranties and force repeat visits.
- Wait for the inspection before moving items. Let the technician assess scope.
- Launder all bedding, clothing and linens on the hottest safe setting. Dry thoroughly and seal in clean plastic bags.
- Bag non‑washables and place them in the middle of the room. Do not spread items to other rooms.
- Vacuum bed seams, upholstery, baseboards and crevices. Dispose vacuum contents in a sealed bag outside.
- Declutter. Move furniture slightly away from walls. Remove outlet covers, pictures and loose items that block access.
- Install mattress encasements and bed‑leg interceptors after treatment. Check interceptors daily for a few weeks.
Day‑of tips: unplug electronics, cover fish tanks, arrange pets to be out of the house. For heat treatments you’ll likely need to vacate for the day and remove sensitive items. For chemical plans follow the tech’s vacancy and airing instructions.
When to call back: any live bugs after the agreed follow‑ups. A reputable company will re‑treat within the warranty window if you followed prep rules.
Guarantees, paperwork, and next steps — what you must demand in writing
Get everything on paper. The contract should list methods, product names and registration numbers, number of visits, follow‑up schedule, total cost, and what extra fees might apply.
Insist the guarantee spells out the re‑treatment window (commonly 30–90 days), the conditions that void it (for example, failure to follow prep), and responsibilities if neighbouring units are involved. If a company won’t commit to written follow‑ups and a clear warranty, walk away.
If things go wrong, document everything: photos, emails, receipts and follow‑up notes. If a company fails to honour a written agreement, contact your provincial consumer protection office or local health authority.
Summary and your next step
Key points: act quickly but calmly. Get a professional inspection first. Compare written quotes, not slogans. Prefer firms that show licence, insurance, product registration and a clear re‑treatment policy.
Your next step: take photos, collect three written bids, check licences and book an inspection. If you’re in the GTA and want a local, proven option, Bug Managers offers free inspections, licensed technicians, eco‑friendly options and a documented re‑treatment policy—call for a no‑nonsense quote.