Act Smart, Not Fast
A hornet nest is not just a nuisance—it’s a risk decision. When it comes to hornet nest removal, you need to determine whether the situation is manageable or if it’s time to bring in professionals who handle these hazards every day.
Understanding the difference between a simple yard issue and a high-risk infestation can prevent injuries, property damage, and costly mistakes.
This guide on Hornet Nest Removal: Safe DIY Steps & When to Call Pros will help you assess the situation, take safe initial steps when appropriate, and recognize when professional intervention is the safest and most effective option.
Make the right call early—because with hornets, acting smart matters more than acting fast.
Spot the nest without getting closer
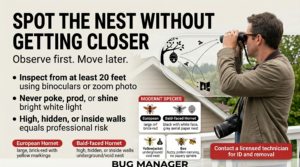
Observe first. Move later.
Effective Hornet Nest Removal starts with accurate identification. Hornets, bald-faced hornets, yellowjackets, and bees may belong to the same family, but their behavior and risk levels are very different. Misidentification is one of the most common mistakes in Hornet Nest Removal, and it can quickly turn a manageable situation into a dangerous one.
European hornets are large, brick-red with yellow abdominal markings and teardrop-shaped dark patches. Bald-faced “hornets” are black with white facial markings and build grey, aerial paper nests. Yellowjackets are smaller, yellow and black, and often nest underground or inside structural voids. Bees are fuzzy, carry pollen, and do not build papery nests—making them a completely different case than typical Hornet Nest Removal scenarios.
Before attempting any Hornet Nest Removal, inspect from a safe distance of at least 20 feet. Use binoculars or a zoom lens to observe activity. Look for flight patterns, entry points, and whether insects are returning to a cavity or a visible hanging nest. This step is critical in planning safe and effective Hornet Nest Removal.
Never poke, disturb, or shine bright white light directly at a nest. These actions can trigger aggressive swarming behavior, significantly increasing risk during Hornet Nest Removal.
If the nest is located high above ground, inside walls, or hidden in an attic, it should be considered a high-risk situation. In these cases, Hornet Nest Removal requires professional tools, protective equipment, and experience. Bug Managers’ rule is simple: if it’s high, hidden, or inside walls, it’s professional-level Hornet Nest Removal.
Inspect from at least 20 feet. Use binoculars or a zoom photo. Note flight paths, entrance holes, and whether insects return to a cavity or a hanging nest. Never poke, prod, or shine a bright white light at the structure. If the nest is high, inside walls, or hidden in an attic — treat it as pro territory. Bug Managers’ quick rule: high, hidden, or inside walls equals professional‑level risk.
If you’re unsure, photograph from distance and save records. Local extension services or a licensed technician can ID species from photos. That one image can prevent a costly mistake.
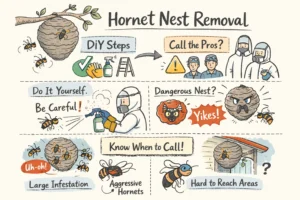
Decide: DIY or call a pro? a simple risk checklist
The nest tells you whether to be brave or prudent.
Ask short, decisive questions: How big is the nest? Is it in a tree, under eaves, or inside a cavity? How close to daily traffic, kids, or pets? Does removing it require a ladder or roof work? Do you or anyone nearby have severe allergies? Is it late in the season and the nest is large and active?
If any answer reads red — hidden cavity, attic or wall location, large nest, hard access, close to family movement, or allergy present — call a professional. Small, low‑hanging aerial nests in early summer that are well away from comings and goings can be handled by an experienced homeowner following strict safety steps.
A professional does things you probably can’t: safe attic access, dust into cavities, make precise wall openings when necessary, provide insurance and a warranty. In the GTA, Skilled Wasp Removal Specialists in Brampton | Bug Managers offers licensed inspections, eco‑aware treatments, and same‑day visits for urgent situations.
Gear up: what to wear, what to buy, what pros use
Protection is not optional — it is the point.
Cover every inch. A beekeeping suit or sealed layers, veil, thick gloves, boots with sealed cuffs, and eye protection. Duct‑tape vulnerable seams. If someone nearby carries an epinephrine auto‑injector, have it accessible. Never work alone. Plan an escape route and a partner to call emergency services if needed.
For tools, choose reach and residual effect. Long‑reach aerosol/foam products with 20‑plus foot spray, professional dusts for entry holes, extension poles, and a sturdy ladder. Use a red‑filter flashlight at night. Know the chemistry: most effective treatments use pyrethroids — permethrin, cyfluthrin or cypermethrin — which act on contact and often leave a residual. Aerosols and foams give contact kill and surface residuals; dusts are best for treating entry points and cavities.
Read labels. Use products outdoors only. Keep wind at your back. Store chemicals safely. Professionals carry commercial dust applicators, specialized extension wands, and equipment to work safely in attics and wall voids — gear most homeowners don’t have. When choosing an over‑the‑counter spray, many homeowners use a foaming wasp and hornet killer designed for long‑range application. For workplace and emergency guidance around stings and protective gear, consult official OSHA guidance on stings and PPE.
Nighttime removal — a step‑by‑step, safety‑first procedure
After dark is your window. Hornets are inside their nest and less reactive. Red light keeps you unseen. If you are uncomfortable at any step, stop and call a licensed crew.
- Scout from a safe distance. Confirm the entrance, plan an escape path, and clear children and pets well away.
- Dress completely in PPE. Have a partner standing by with phone ready and an escape lane planned.
- Stand 20+ feet back with the wind at your back. From that distance, use a long‑range aerosol or foaming product and saturate the nest entrance and outer shell for the time the label recommends (typically 6–8 seconds of steady spray).
- Wait and observe from a safe distance for 15–30 minutes. If activity continues, reapply. In many cases a thorough overnight saturation is best; wait 24 hours before close inspection.
- Once there is no visible activity, remove the nest only if it is accessible without risky climbing. Use a pole or cut carefully, double‑bag the nest, seal, and dispose in outdoor trash immediately. For cavity or attic nests do not cut openings yourself — call professionals.
- Clean the area with soap and water to remove pheromone cues. Seal entry points to prevent re‑occupation. Monitor the site closely for 48–72 hours.
Do not poke, burn, or douse nests with gasoline or household flammables. Those actions are dangerous and often illegal. Traps and baits reduce foragers but do not replace treating the nest.
After the smoke clears: cleanup, prevention, and monitoring
The best removal is permanent prevention.
Wait at least 24 hours after treatment before handling debris. Double‑bag and seal. Clean surfaces and siding with soap to remove pheromones that attract survivors. If attic insulation was contaminated, vacuum or replace as needed.
Prevent re‑nests by sealing gaps with caulk and steel mesh, repairing soffits and eaves, trimming branches away from the roofline, and removing food sources like exposed compost, sugary spills, or fallen fruit. Install screens on vents and use hardware cloth around potential entry points.
For homeowners who prefer a long‑term fix, professional exclusion and pest‑proofing makes sense. Bug Managers performs targeted exclusion using wildlife‑proof materials and offers scheduled inspections so a small problem never becomes an emergency. They also provide related services such as Bird Proofing Services, Bug Managers, Bird Removal, Bug Managers, and Bird Control, Bug Managers for homes with multi‑pest concerns.
If you need help identifying the species or learning what to expect from seasonal behavior, reputable extension resources like the University of Maryland overview of social wasps can be useful reference points.
When a pro should come: what to expect and what it costs
Paying for a pro is a small insurance premium against danger.
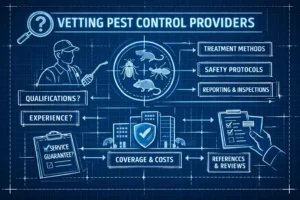
A reputable technician will perform an on‑site inspection, identify the species, recommend a targeted treatment plan (aerosol/foam/dust), perform full extraction if safe, repair attic or wall openings, and provide follow‑up and guarantees. Ask upfront: Are you licensed and insured? What chemicals will you use? Is disposal and repair included? Can I get a written estimate and warranty?
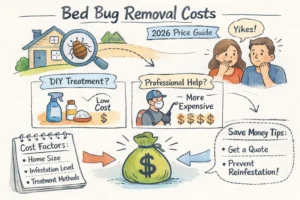
Costs vary by species, size, and location. Simple outdoor nests often fall in the lower bands; attic, wall, chimney, or large nests command higher fees. Typical ranges for residential jobs are commonly in the $300–$700 band, with higher prices when access, repair, or follow‑ups are required. Regional factors and urgency affect final quotes. For ballpark removal estimates and regional cost examples, see a consumer cost guide such as wasp and hornet nest removal cost estimates. Always request an itemized estimate. When a technician must identify the species in the field, reputable sources such as the Ohio State extension factsheet on social wasps can help explain differences in behavior and nesting.
In the Greater Toronto Area, Bug Managers offers licensed, insured, eco‑aware removal, attic access and exclusion work, and same‑day inspection when the situation demands rapid action.
One short nudge
If the nest is small, low, and you have the right gear, follow the night‑time, safety‑first steps above. If it’s hidden in a wall, high on a roof, near daily traffic, or anyone nearby is allergic — hand it to licensed hands. Better judgment costs less than a hospital visit.
Two things to remember: protect yourself first. When in doubt, call a pro.
For a same‑day inspection, eco‑aware treatment, and exclusion work in the GTA, contact About, Bug Managers and get a written estimate from a licensed team.